It has been a crazy month and a half. In the last six weeks, I have been fortunate enough to test for three different designers! Like the old saying goes, when it rains, it pours. It has been such an interesting experience, and one that I will save for a different blog post. Because today, what I want to talk about is half square triangles and a little trick I learned to help get those seams and points to line up perfectly (or near perfectly).
I will be the first person to tell you...perfect seams don't matter. I will also be the first person to admit that I will try to make them perfect. It has been a bit of a quilting quest.
Here is my one rule on lining up seams. It has to be the best I can do. That doesn't mean they have to be perfect 100% of the time. It just means that I always want to do my best work. Sometimes, those seams aren't going to line up. That's ok. We are human beings working with fabric and thread. Perfection doesn't have to apply here. However, there is something soooo satisfying when you can get those seams and points right...right?
A few weeks ago, I was chosen by the extraordinarily talented Sharon Holland to test her new Phoenix pattern (pictured above). Of course, I wasn't going to pass up this opportunity. It's a beautiful pattern made up of--you guessed it--half square triangles (or HST's).
My history with HST's is dicey, at best. They are at once a deceptively simple block and one that requires a lot of precision BECAUSE of it's simplicity. It's hard to hide a wonky HST. And all it takes is to put together 18 slightly differently sized HST's and now your row is way off.
The first HST quilt I made is still hiding at the bottom of a basket somewhere. I quickly learned I needed to improve a few things before attempting them again. I've made quite a few quilts since then and have learned a lot in the process. So when I saw Sharon's pattern, I felt I was ready to do this.
I showed up prepared this time. Armed with a bloc loc ruler for trimming, a rotating cutting mat (imagine a lazy Susan turntable and cutting mat had a baby!) to make cutting easier and with a fresh blade on my rotary cutter, I was ready. I was not a newbie quilter anymore...I could do this!!
You can imagine my over-the-moon happiness when all my HST's were trimmed, square and accurately sized.
Then, I hit the second hurdle that had haunted my previous HST experience: making sure I would get good points and seams when sewing them together.
I think I had read every blog post out there on how to match up your seams when sewing. Among the most common solutions are: pinning a certain way or glue basting.
No doubt, glue basting works. However, I can be a bit heavy handed with glue (if a little is good, a lot is better right???). But even when I managed to control myself, I didn't like having to "unglue" the seam to press it open. It's "fiddly work" as they say on one of my favorite TV shows (A Stitch in Time--watch it on Amazon Prime...then thank me later when you are done binge watching it!)
So, anyhow, I did not want to glue baste every HST in place. There were a lot of them in this pattern.
So that left pinning. Several posts I read said to pin vertically straight down through the seam. It could have been user error, but this did not work for me for two reasons. First, my seam would separate quite a bit. Secondly, when I would remove the pin so I wouldn't sew over it (I'm terrified of losing an eye), I would open up my row and the seam had shifted anyway.
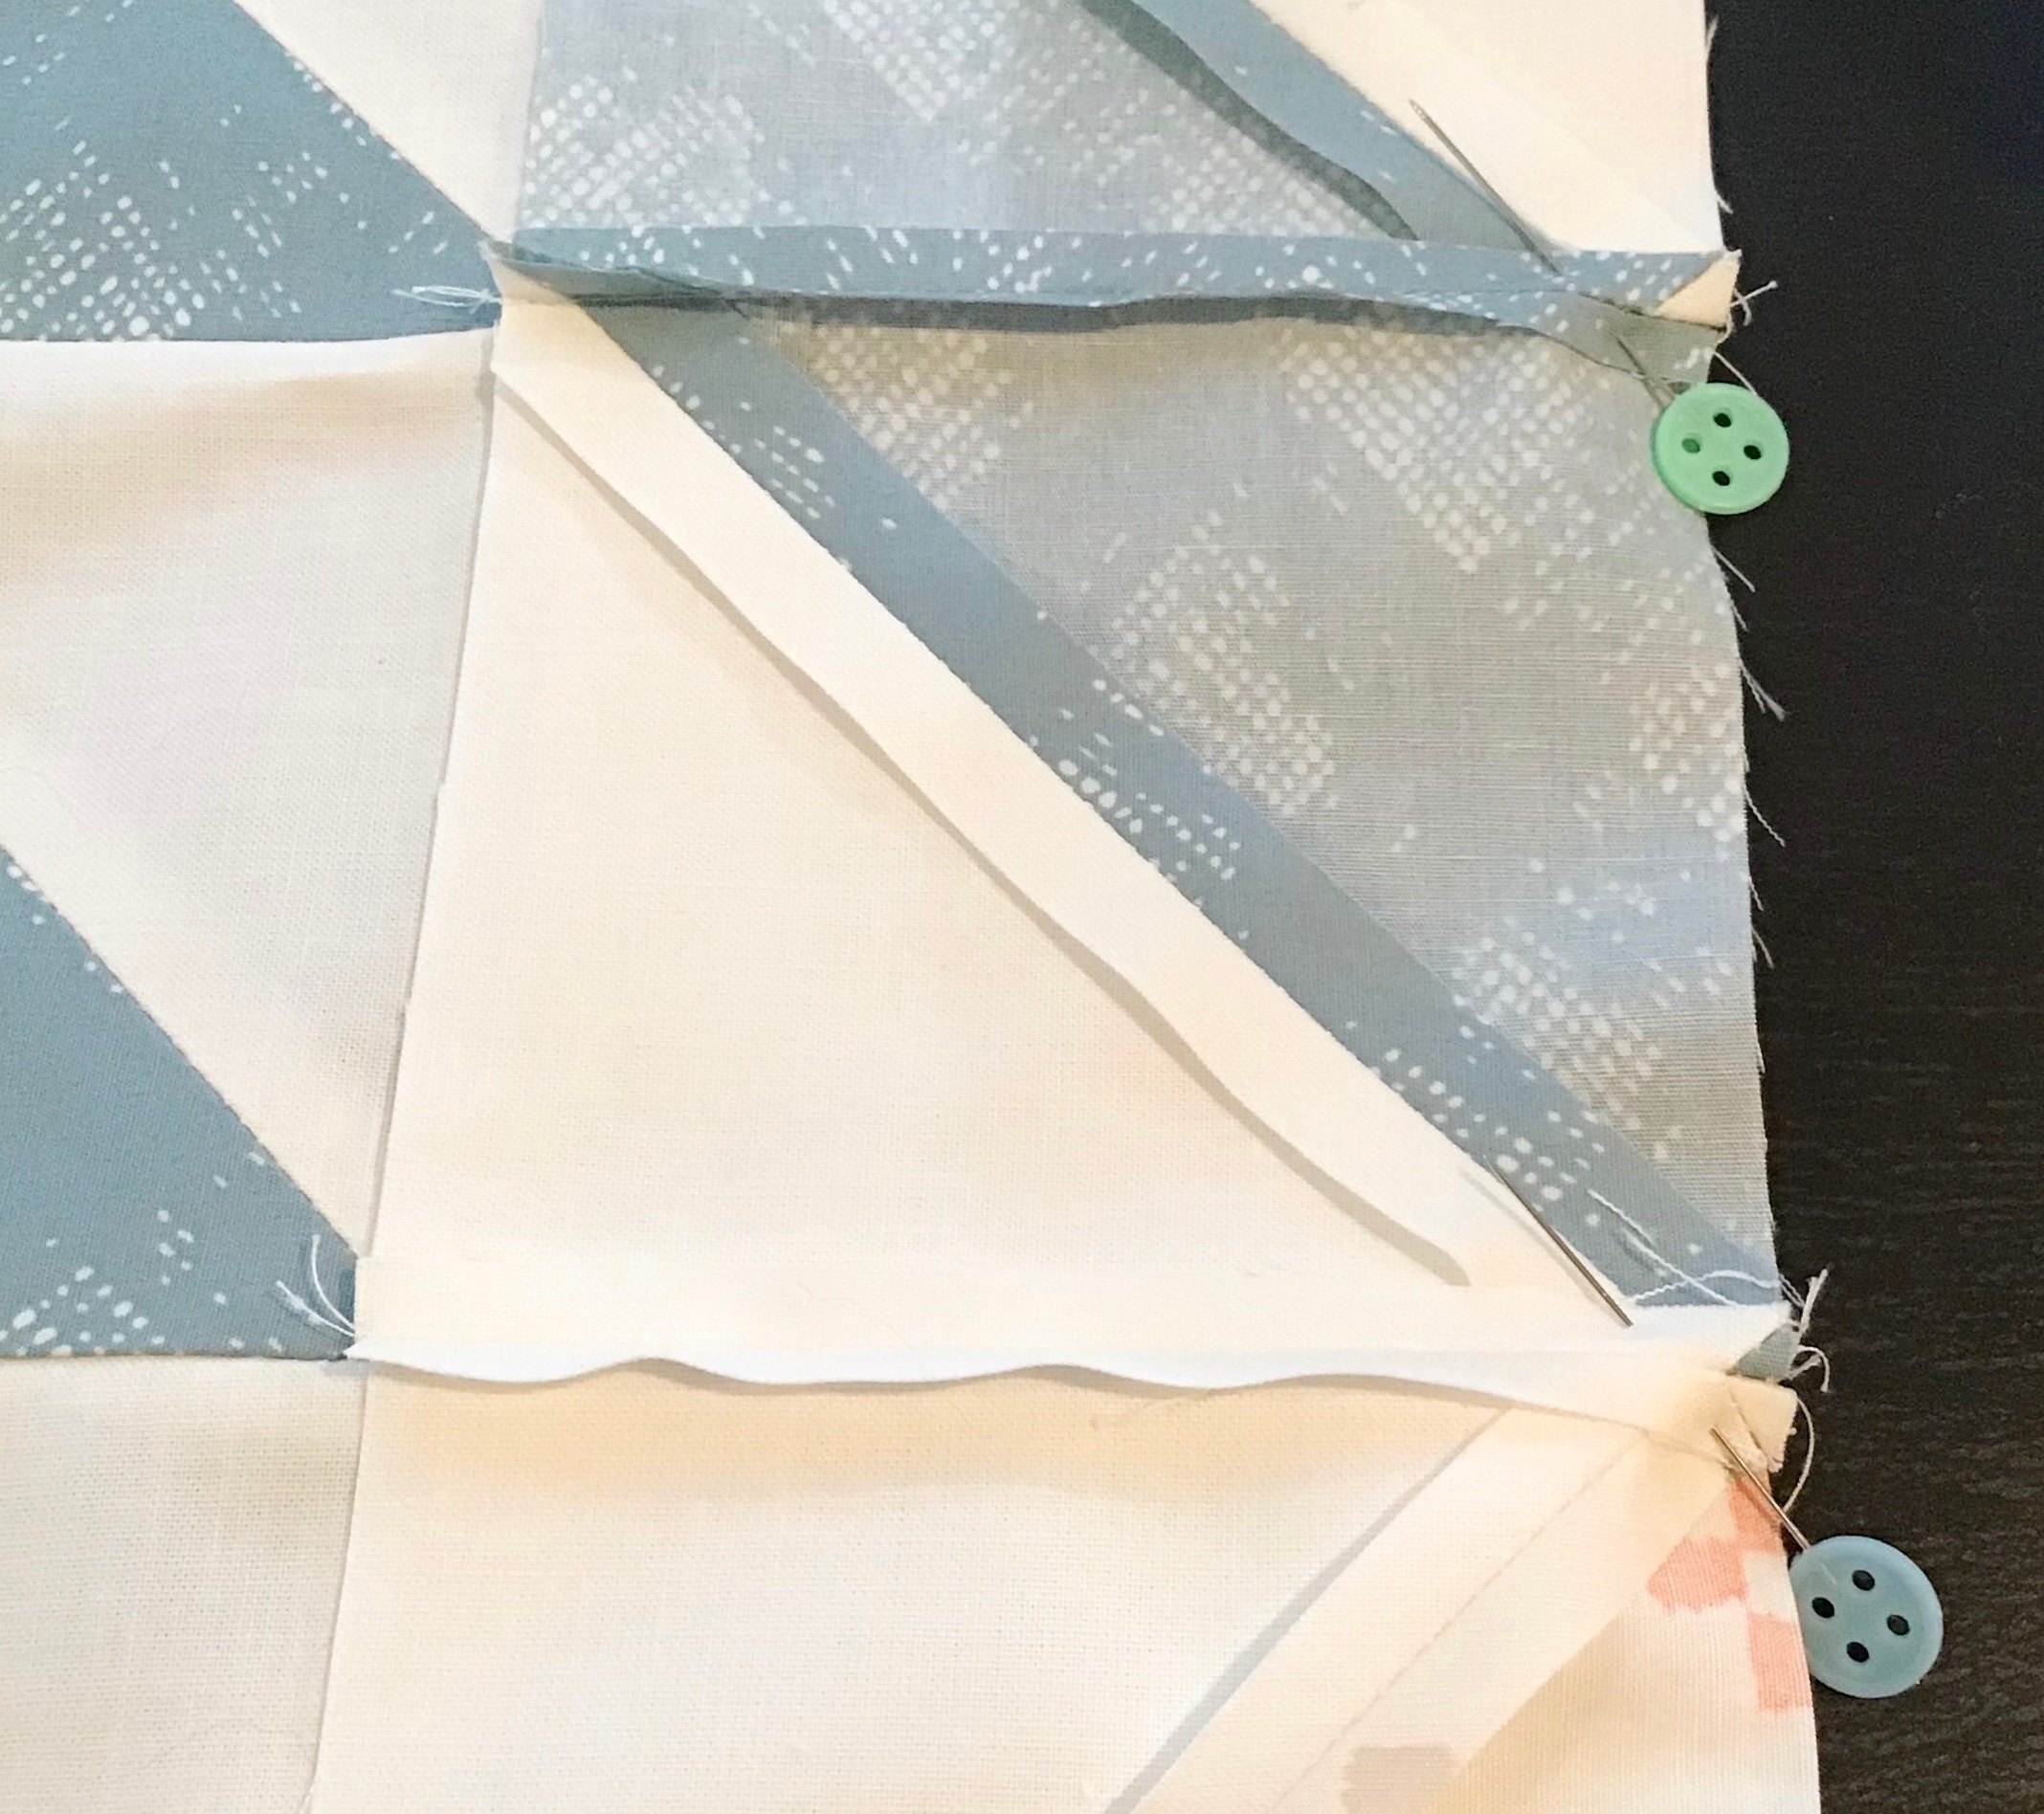
But here is my little secret: DIAGONAL PINNING.

Setting my pin diagonally so it went in through one side of the seam and came out on the other side of the seam accomplished several goals at once.
1. It kept my seam solidly in place
2. Allowed me to sew a stitch or two into my seam before needing to remove my pin--so there was no way the seam would shift
3. Kept those pesky seam allowances in place...versus having them flip over on me while I sewed. (I think you know what I am talking about)
So here are some little tips to help you get the diagonal pinning right.
Make sure you start with a properly placed seam. The diagonal pin will hold your seam in place...so if you don't have it lined up right when you pin it together, it's not going to be lined up when you when you sew it together either.
Like the picture shows, I liked to push my pin down into one side of the seam through the seam allowance, then push it back up into the other side of the seam, on the opposite seam allowance.
I preferred to have the sharp point of my pin facing towards my sewing machine needle, with the head of the pin facing towards me. This allowed me pull the needle out easily when I needed to.
I do understand there is a chance of getting poked while the fabric feeds through since the pointy end is moving upward to where your hands are...but I didn't have any issues getting poked. Maybe I was just lucky, but just keep in mind there is a chance of getting poked. However, if we didn't like some danger, we wouldn't work with sharp scissors, pointy needles and hot irons, right?
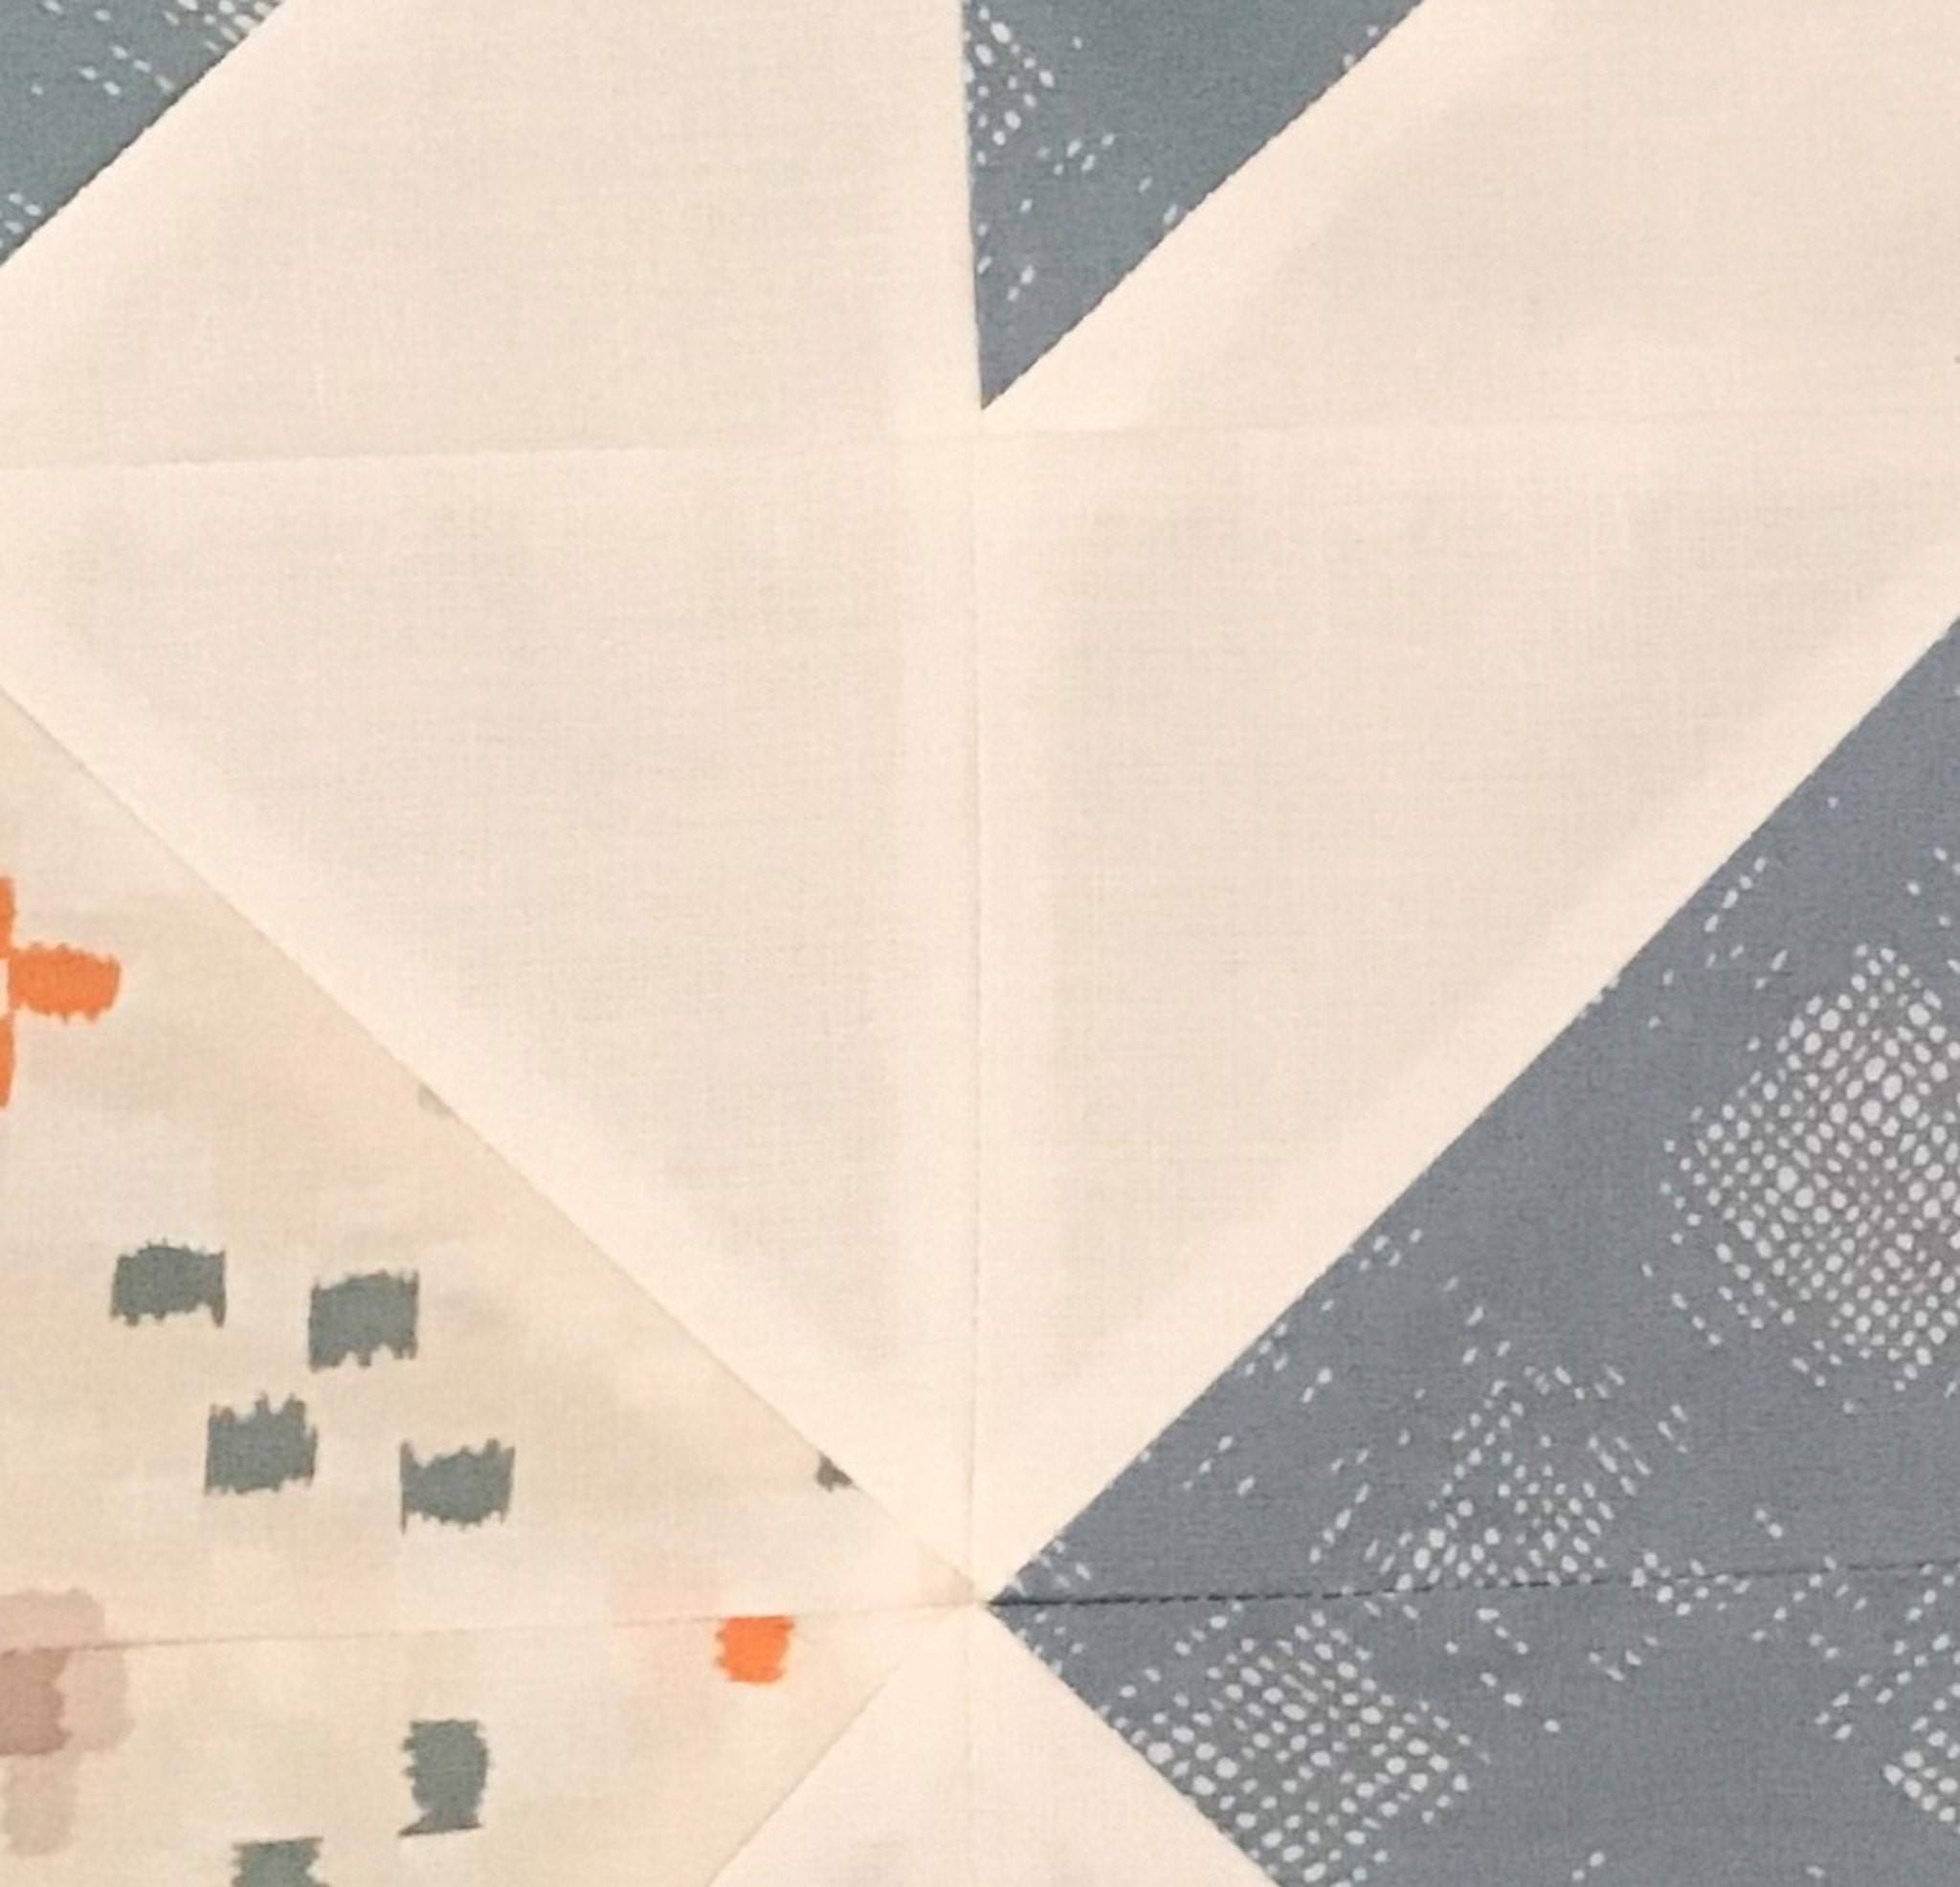
And voila! Fabulous points and seams like this...

So I hope this little trick helps you. I'd love to know if it does. And if you want a great pattern to practice your HST's, pick up the Phoenix pattern by going to www.sharonhollanddesigns.com
It's a beautiful, versatile pattern that should be in every quilter's catalog.
Until next time, happy sewing!
